Steps to Running a Session
The basic steps to Start, Record and View Sessions are as follows...
Note: Before using the emWave software it is recommended that you understand the emWave Key Concepts and review the Quick Coherence technique.
- Plug-in the USB Sensor or the emWave2 Handheld Device into an available USB port on your computer.
- Put on the the Ear Sensor or Finger Sensor and make sure they are securely connected.
- After properly connecting the ear or finger sensor, click the Start Button
 on the bottom toolbar. Wait for the sensor to calibrate, if you are using the emWave2 Handheld device the pulse LED on the device will begin to flash blue indicating a pulse is detected. If the pulse LED is red or unlit, reposition the ear sensor until it flashes blue. In emWave Pro you should see a pulse graph showing how well your pulse is being read.
- Record an Accurate Pulse: Remember to take a few seconds each time you start a session to check your pulse signal. Make sure your ear is positioned in the sensor so the pulse LED is flashing blue. Also, sit quietly and avoid talking. If you are seeing red lines (artifact) in your heart rhythm pattern, adjust your sensor until your pulse wave data shows distinct, smooth wave forms.
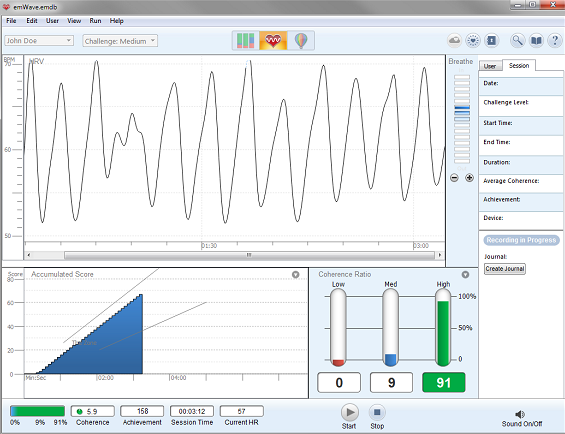
- View the Recorded Data and Coherence Ratio
- To stop the session simply click the Stop Button
 .
.
- After stopping your session your data will be saved automatically for later review.
For additional support, please see the HeartMath Knowledge Base at:
Support: http://support.heartmath.com
Or, send your question in email to Technical Support Send Mail